
Use Cloudflare SSL certificates with Dokku
Lately I was reconfiguring my pet projects server and decided to try to use Cloudflare SSL certificates with Dokku.
These certificates can be generated via Cloudflare console and then used to protect connection between your server and their server, this is to replace Let’s Encrypt certificates.
One major downside of Cloudflare certificates is inability to use them outside of their proxy, you have to enable that orange ☁.
Let’s start
So, the first step is to generate the certificate. Access Cloudflare Dashboard and head to SSL/TLS -> Origin Server, then click** Create Certificate **button.
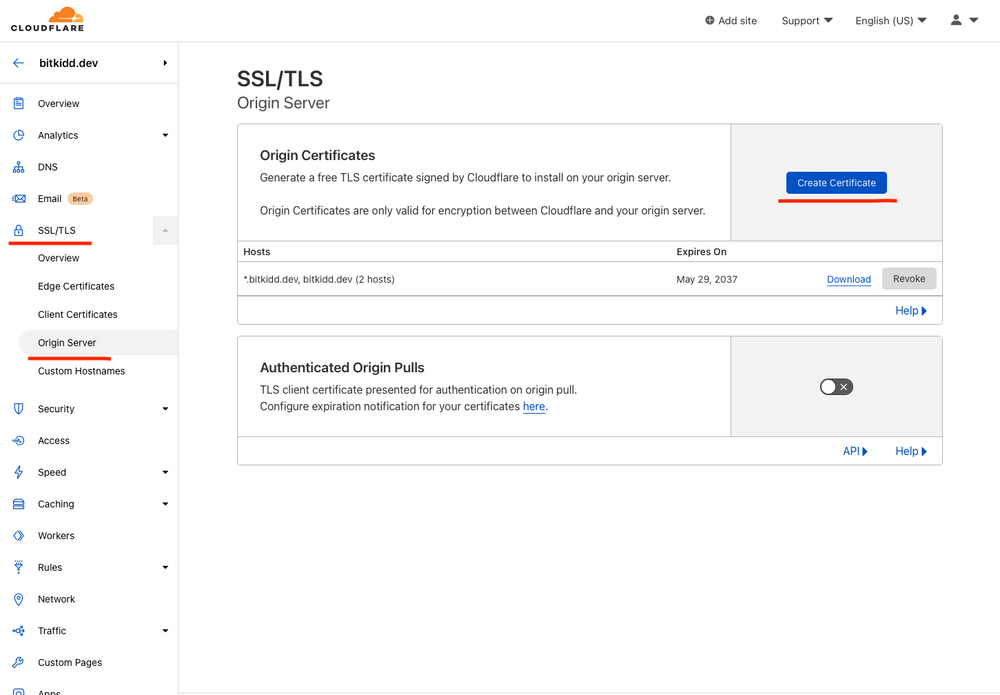 Create Cloudflare certificate
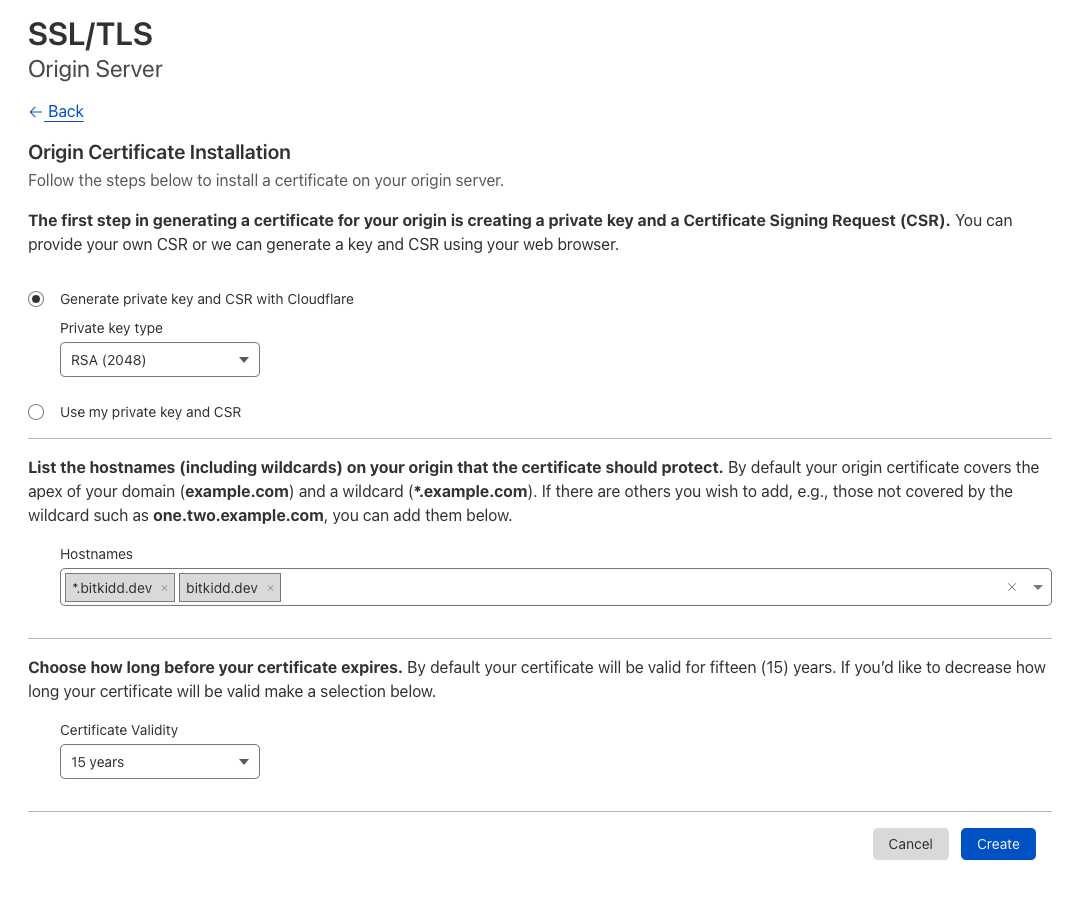
As you click, a new page will open and Cloudflare will ask you about private key type, hostnames and the amount of years you want your certificate to be valid. I usually leave these default and click Create.
Create Cloudflare certificate
As you click, a new page will open and Cloudflare will ask you about private key type, hostnames and the amount of years you want your certificate to be valid. I usually leave these default and click Create.
 Certificate options
The next screen will allow you to save you certificate and a key. At this time you’ll need to connect to your server and continue there.
Certificate options
The next screen will allow you to save you certificate and a key. At this time you’ll need to connect to your server and continue there.
We’ll need to create two file, a .crt and a .key, first let’s create a .crt file.
Copy **Origin Certificate **from Cloudflare dashboard and then run on your server:
nano bitkidd.dev.crt
// use your domain name here
// paste data that you copied
// and hit ctrl+x to save it
Copy **Private Key **from Cloudflare dashboard and then run on your server:
nano bitkidd.dev.key
// use your domain name here
// paste data that you copied
// and hit ctrl+x to save it
At this point we should have two new files on the server that include some data that we copied from Cloudflare Dashboard. Now we need to bundle these files in a .tar bundle, this way we then can feed that file to Dokku.
tar -cvf bitkidd.dev.tar bitkidd.dev.crt bitkidd.dev.key
Now, as a new **bitkidd.dev.tar **is created, we have to provide it to Dokku and configure the certificates for an app. In my case the app is this website itself.
dokku certs:add bitkidd < bitkidd.dev.tar
As you run the command, you will see some reports that certificates were installed and basically this is it.
The last thing that you should do is to enable Full (strict) mode for SSL inside the CLoudflare Dashboard.
